How to make candles at home
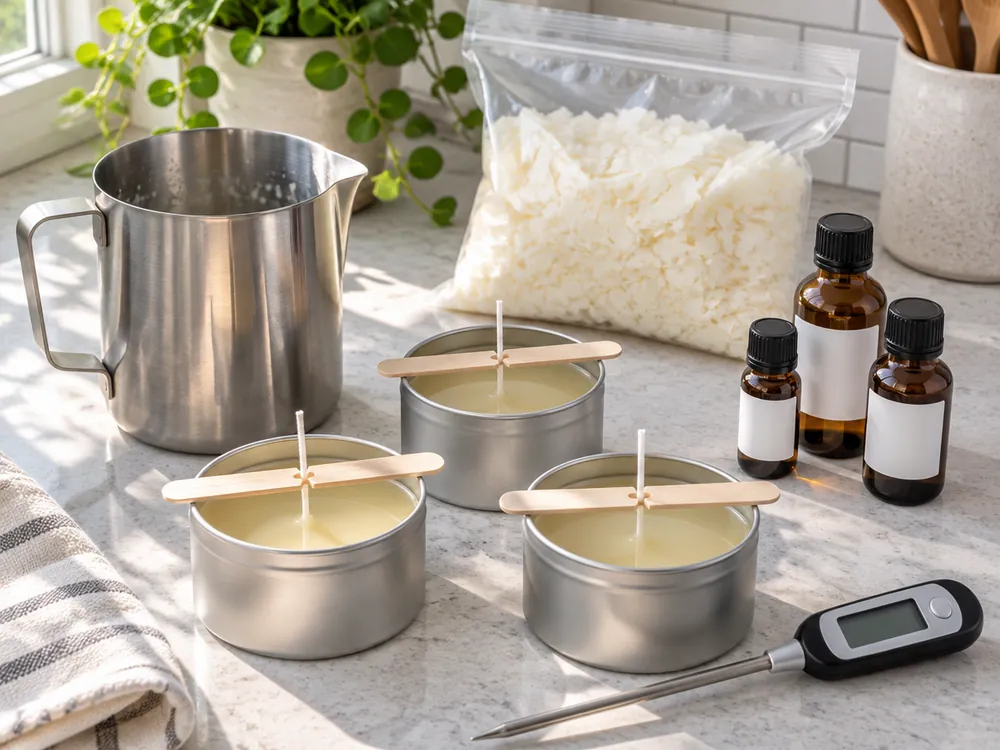
To make a candle at home, fix a wick to the centre of a heatproof container, melt wax in a pouring pot set in a pan of simmering water, stir in fragrance oil and colour at the temperatures your wax and oil labels give, then pour slowly and leave it to set undisturbed. Trim the wick and let the candle cure before lighting it.
What do you need to make candles at home?
Container candles, the kind poured into a tin or jar, are the place to start. The wax stays in its container, so there is no mould to release and far less that can go wrong. You need:
- Wax. Soy wax is the usual choice for container candles. Beeswax is harder and has a scent of its own.
- Wicks with a sticker or a dab of wax to fix them to the base, and a wick holder or two pencils to keep them upright.
- Containers. Tins or thick glass jars made to hold a candle.
- A pouring pot and a saucepan to melt the wax gently in a water bath, never over a direct flame.
- A thermometer and kitchen scales. Temperature and weight are what make the difference between a good candle and a disappointing one.
- Fragrance oil and colour, if you want them. Use oils and dyes listed for candle making.
- Kitchen roll, newspaper and an old spoon. Wax gets everywhere.
A kit is the easiest way to get all of that matched up first time. The ETUOLIFE candle making kit holds 480g of soy wax in eight 60g blocks, eight tins, four fragrance oils (rose, lemon, lavender and vanilla), a melting pot with a stirring spoon, 50 wicks, dye blocks and a heat-insulating mat. The maker says each 60g block makes one candle, which takes the guesswork out of quantities. You will still want your own thermometer.
Candle making kits
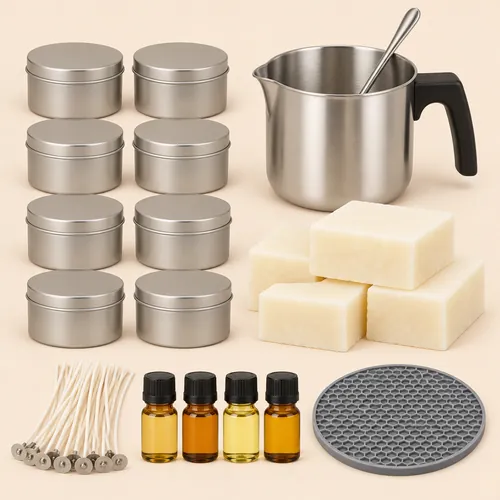
Candle making kit, 8 tins, 480g soy wax
£24.99
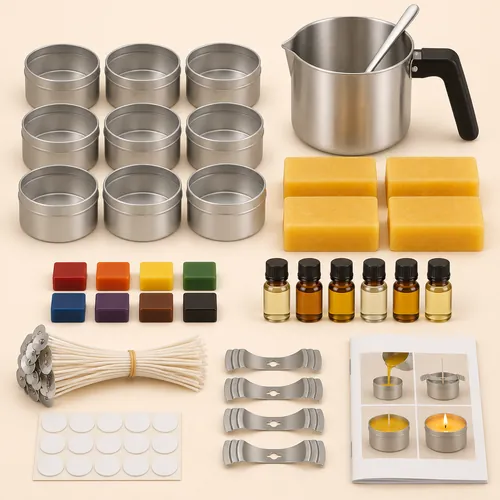
Beeswax candle making kit, 9 tins
£26.99
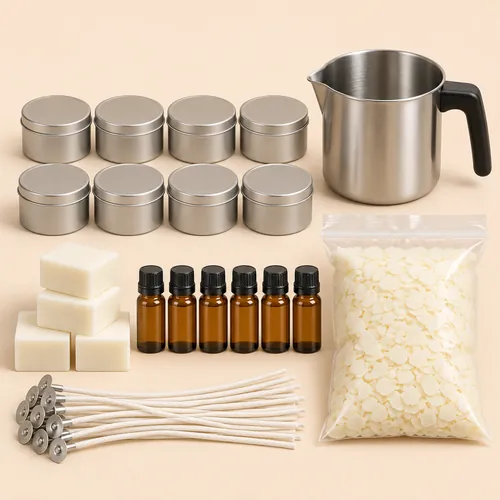
Christmas candle making bundle
£47.99 £51.97 separately
How to make a soy wax candle, step by step
Read the safety label and instructions that come with your wax, wicks and oils first. Where they give a temperature or an amount, theirs is the number to use, because waxes and oils differ. Never leave hot wax unattended, and do not melt wax in a microwave unless your kit's instructions say to.
- Set up your spaceCover the table with newspaper, put the containers on a tray, and keep children and pets out of the kitchen. Make sure the containers are clean and dry: a drop of water in hot wax spits.
- Fix the wicksStick a wick sticker to the metal tab at the bottom of each wick and press it to the centre of the container base. Stand the wick upright with a wick holder or rest it between two pencils laid across the top.
- Weigh the waxWeigh rather than guess. If your kit gives a weight per container, use it. Otherwise, fill the container with water, pour that into a jug on the scales, and use a little less than that weight in wax. Then dry the container thoroughly.
- Melt it in a water bathPut the wax in the pouring pot and stand the pot in a saucepan of gently simmering water. Stir now and then until every flake has melted. Keep the thermometer in and the heat low.
- Add scent and colourTake the pot off the heat. When the wax reaches the temperature your wax or fragrance label gives for adding oil, stir in the fragrance in the amount the label allows, slowly and steadily for a full couple of minutes so it binds with the wax. Add dye a drop at a time.
- Pour at the right temperatureLet the wax cool to the pouring temperature on the wax's label. Pour slowly down the side of the container to avoid bubbles, and keep back a little wax in the pot for a top-up.
- Centre the wick and leave it aloneCheck the wick is still centred and straight. Leave the candle to set at room temperature, away from draughts and cold windows, for at least a day. Moving it or chilling it to speed things up causes cracks and dips.
- Trim and cureTrim the wick to about 5mm above the wax. Soy candles smell stronger after curing for a while, so wait before lighting; your wax or oil instructions may give a time, and many makers leave them a week or two.
Why is my candle tunnelling?
Tunnelling is when a candle burns a narrow hole down the middle and leaves a thick wall of unmelted wax round the sides. There are two usual causes. The first is a wick too small for the width of the container, so the flame cannot melt wax out to the edge. The second is a first burn that was too short: wax has a memory, and later burns tend to follow the pool the first one made.
To prevent it, let the first burn run until the melted pool reaches the edge of the container, which is often a few hours for a wider candle, and never longer than the wax or wick instructions advise. For a candle that has already tunnelled, wrap a collar of kitchen foil round the top of the container, leaving a hole over the flame, and light it while you stay in the room. The foil reflects heat onto the walls and melts them level. If tunnelling happens every time, try a thicker wick or a narrower container next batch.
How to fix frosting, sinkholes and other common problems
| Problem | What causes it | How to fix or avoid it |
|---|---|---|
| Frosting: a white, crystal-like bloom on top or sides | Natural to soy wax as it settles; worse with big temperature swings | It is cosmetic and burns normally. Pour a little cooler, warm the containers first and let the candle cool slowly at room temperature. |
| Sinkholes and dips round the wick | Wax shrinks as it cools, pulling down near the wick | Poke a few holes near the wick with a skewer once the top has set, then top up with the wax you kept back, reheated. |
| Cracks in the surface | Cooling too fast, in a fridge or by a cold window | Cool at room temperature, away from draughts. A heat gun or hairdryer passed over the top can smooth it. |
| Wet spots where wax pulls from the glass | Wax shrinking away from a cold jar | Warm the jars before pouring. It does not affect how the candle burns. |
| Weak scent | Oil added too hot, too little oil, or not cured long enough | Add oil at the temperature on the label, in the amount the label allows, stir it in for longer and give the candle time to cure. |
| Black smoke or a tall, flickering flame | Wick too long or too big | Trim the wick to about 5mm before every burn. If it still smokes, use a smaller wick next time. |
| Flame drowns and goes out | Wick too small or trimmed too short | Pour off a little liquid wax and relight. Use a larger wick next batch. |
Which wax, wicks and scents should you buy after a kit?
Once a kit runs out you will have the pot, the tins and the habit, so all you need is more wax, wicks and scent. Our Mouldmaster soy wax flakes come in a 1 kg pack listed for container candles, and the maker gives a melting point of 45 to 55°C and a pouring point of 50 to 70°C. The Keratobleem cotton wicks are pre-waxed, with 30 at 10cm and 20 at 20cm, plus 60 wick stickers and 4 wooden wick holders. Check the wick length against the height of your container.
For scent, the Lagunamoon set of 16 fragrance oils lets you try many scents before committing to a big bottle, and lists candle making among its uses. For colour, liquid candle dye goes in a drop at a time, and the number of drops sets the depth of colour. All three dye sets in the candle aisle list soy wax and beeswax as suitable.
To keep making candles
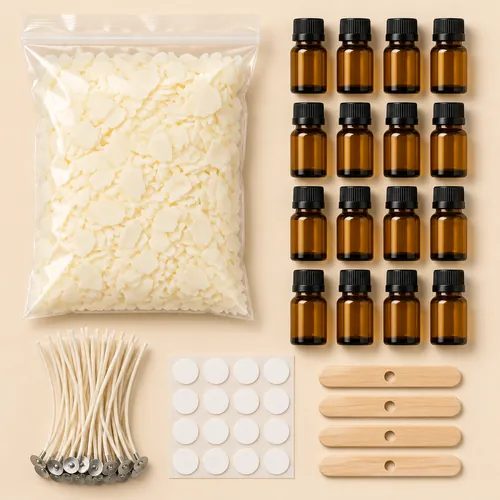
Candle maker refill bundle
£41.99 £44.97 separately
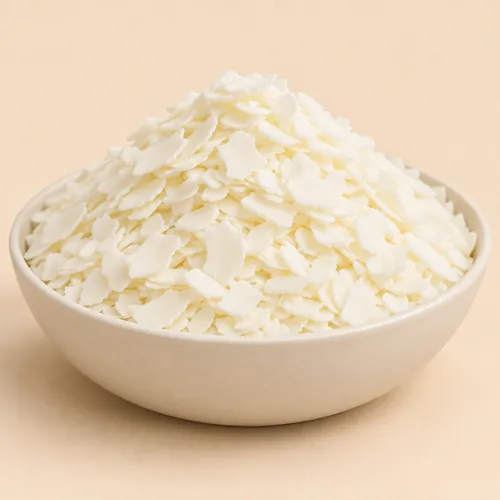
Soy wax flakes, 1 kg
£12.99
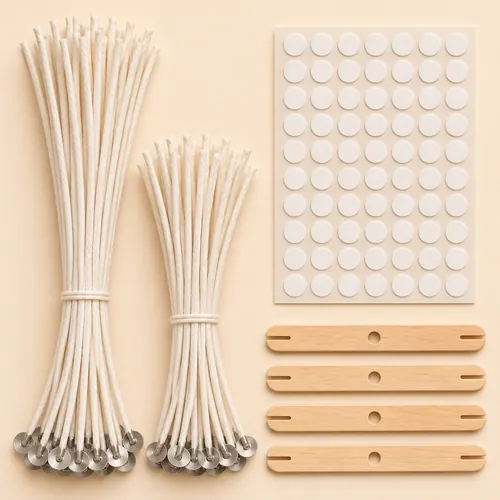
Cotton candle wicks, 50 pieces
£7.99
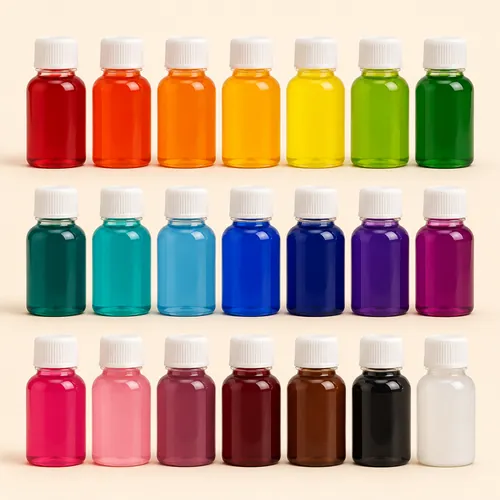
Liquid candle dye, 21 colours, 10ml each
£16.99
How do you make candle making safer at home?
- Follow the safety label and instructions on every wax, oil and dye.
- Never leave hot wax unattended, on the hob or off it.
- Melt wax in a water bath, never in a pan straight over the heat, and do not use a microwave unless your kit says to.
- If wax ever catches fire, turn off the heat and cover the pan with a lid. Never throw water on burning wax.
- Do not pour leftover wax down the sink. Let it set in the pot and lift it out, or wipe the pot with kitchen roll while it is still warm.
- Burn finished candles on a heatproof surface, away from anything that can catch, and never leave a lit candle in an empty room.
Once you have the method, the same wax and oils make wax melts, which need no wick at all. And if you are making candles as Christmas presents, our list of Christmas crafts for adults has more ideas to go with them.
Questions
Is it cheaper to make your own candles?
Once you have a pot, a thermometer and some tins, more wax, wicks and oil go a long way, so a batch usually costs less per candle than buying them. A first kit is more about learning the craft than saving money.
Can I use essential oils in candles?
Only if the oil's listing says it is for candle making, and follow its safety label for how much to add. Fragrance oils sold for candle making are the usual choice, as they are made to hold up in hot wax.
How long should homemade candles cure?
Your wax or fragrance instructions may give a time. Many makers leave soy candles a week or two before burning, because the scent grows stronger as the wax settles. A candle lit the day after pouring often smells faint.
Why did my soy candle go white on top?
That is frosting, a crystal-like bloom natural to soy wax. It is cosmetic and does not change how the candle burns. Pouring a little cooler and letting the candle cool slowly at room temperature makes it less likely.
What size wick do I need for my candle?
It depends on the width of the container and the wax. A wick that is too small tunnels; one that is too big smokes. Start with the wick your kit supplies for its tins, and test-burn one candle before making a batch in a new container.